How to replace Mini Micro/Maxi Micro T-tube button
- Remove any parts that may be left inside the t-tube
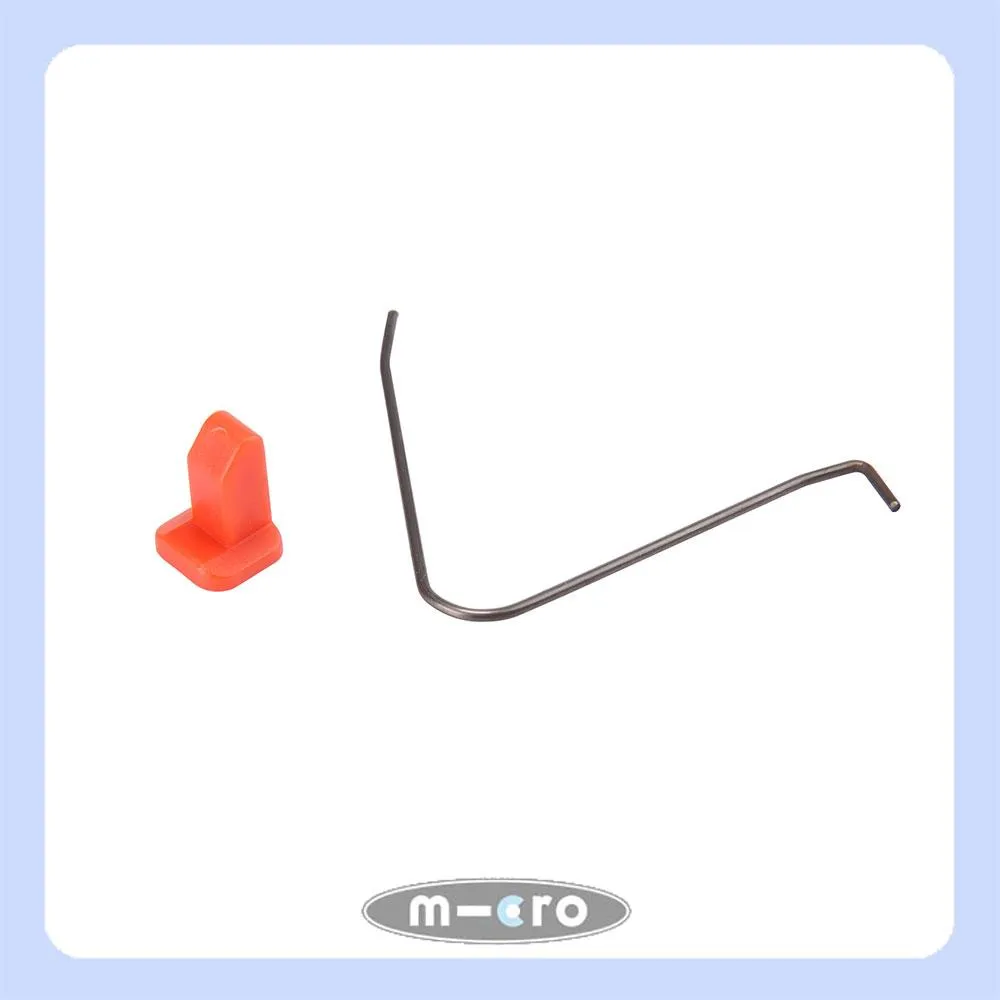
- Fit the Red or Black plastic push button on the silver spring, ensure that the long flat side of the button is facing away from the bend in the spring (see left)
- Push the end of the spring with the bend in it into the handle tube pinching the spring to allow the button to fit inside, you may need to adjust the position slightly until the button pops out the hole in the t-tube
- Push the handles into the base, you should hear a click once in place and secure
The great thing about Micro Scooters is that we have a – as you know since you’re here. Since Micro Scooters have few moving parts and they are largely screwed together instead of fused, most parts can be easily replaced.
The key thing to help your Micro Scooter last the distance is maintenance, maintenance and maintenance. We recommend tightening the nuts and bolts every few weeks and giving your scooter a full service every four months or so to keep to keep it in its best condition. To get the full run down about how to tighten the nuts and bolts or a give your scooter a full service head to our maintenance pages. We also have a for you to check out if you would like us to complete the service alongside you.
Kids scooters get a lot of use as well, remember to give them a regular once over to enhance their longevity! Check out our repairs page – where there is information on how to
Before you start the repairs – we want to let you know that each scooter has a two year warranty, have a scroll through what this encompasses on our warranty page. If you haven’t activated your warranty yet, don’t worry we’ll !

")
")


